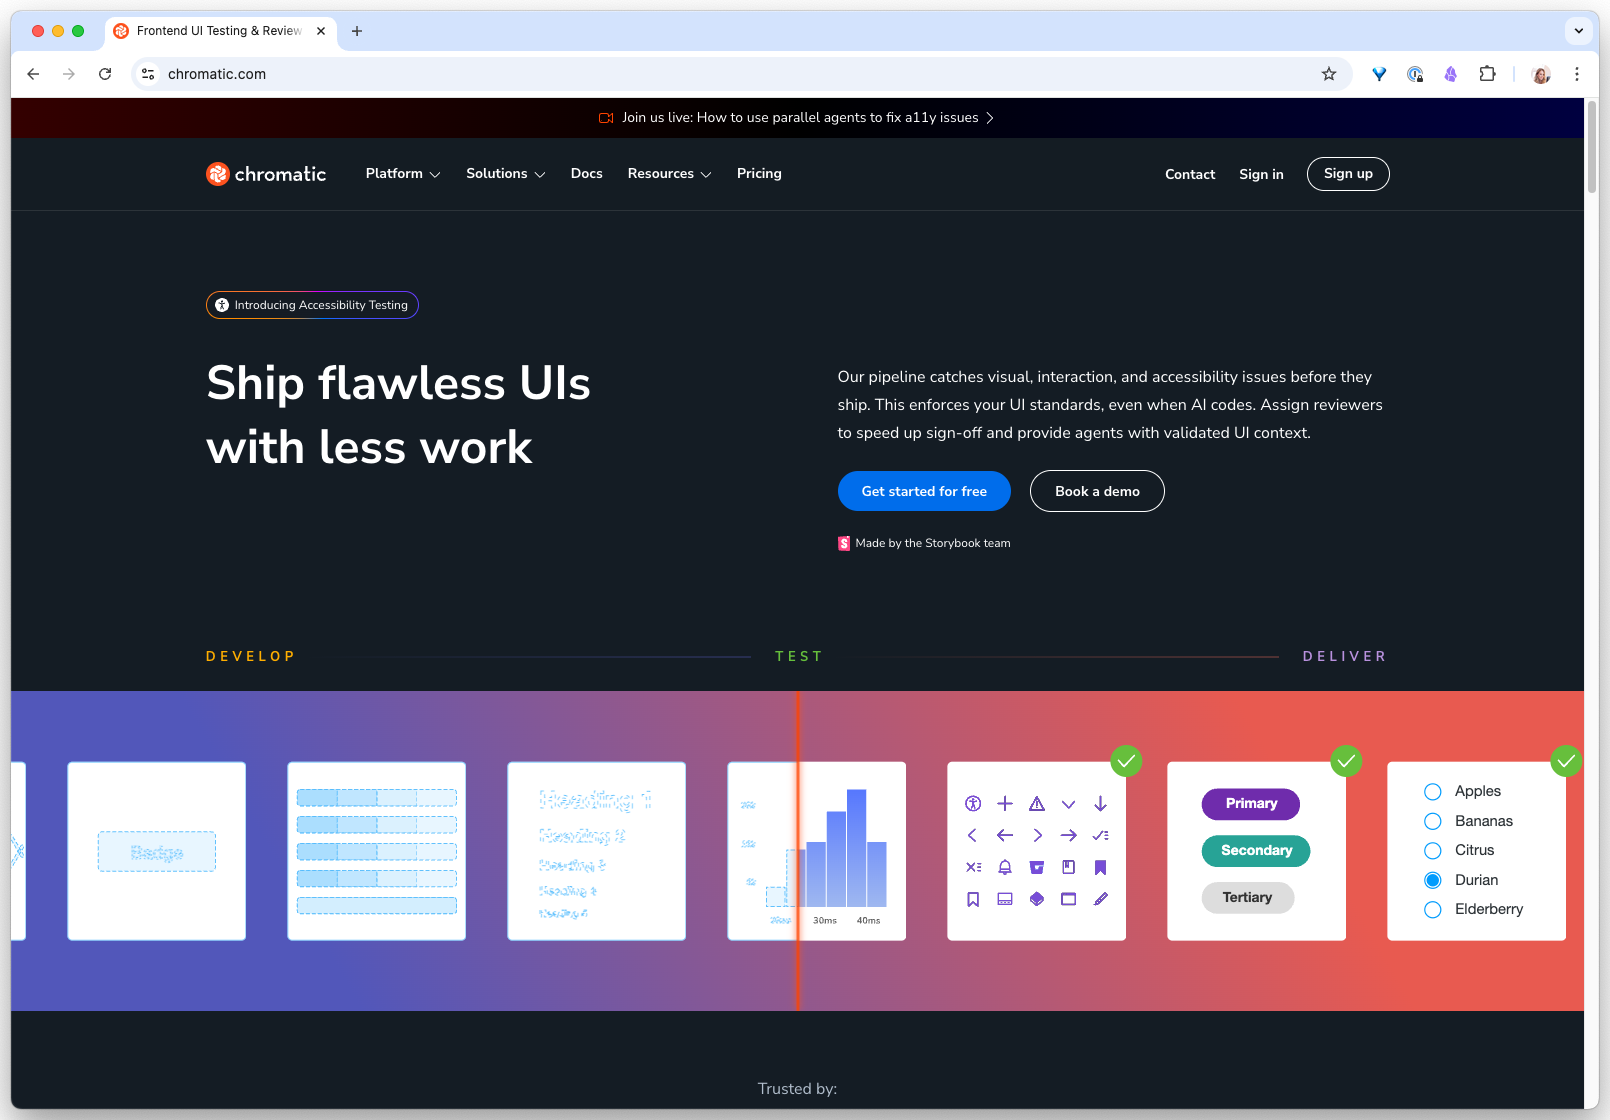
Set Up Visual Regression Testing with Chromatic
Catch visual regressions in your Storybook before they reach production. Every component change reviewed, approved, or flagged.
What you will need
Version 7 or later recommended. Chromatic snapshots one image per Storybook story.

GitHub, GitLab, or Bitbucket. Chromatic uses your commit history to associate snapshots with branches.
Free tier includes 5,000 snapshots per month. Sign up with your Git provider.
Your Storybook project must be in a repo. Chromatic links snapshots to commits.
Time to install the CLI, run your first build, and connect it to CI.
- 01
Storybook
Your component stories are the source of truth
- 02
Baseline
Chromatic snapshots every story on first build
- 03
Diff
Each new commit is compared pixel by pixel
- 04
Approval
Accept intentional changes, deny regressions
Why This Matters for Your Design System
A padding value changed in a shared component three weeks ago. Nobody noticed. Then a stakeholder asked, “Did the spacing on the dashboard change?” and your team spent an entire afternoon digging through 47 commits to find the one line that broke it.
Chromatic makes that scenario impossible. It snapshots every Storybook story on every commit and flags the pixel-level diff before anything merges. If you already have Storybook, this is a 15-minute setup that gives you a design review gate your engineering team will actually use.
Step 1: Create a Chromatic Project and Install the CLI
Sign up at chromatic.com using your GitHub (or GitLab/Bitbucket) account. Create a new project and link it to your repository. Chromatic will give you a unique project token.
Then install the Chromatic CLI in your project:
npm install --save-dev chromaticAdd a script to your package.json so you can run Chromatic builds easily:
{
  "scripts": {
    "chromatic": "chromatic"
  }
}
Why this step matters: The project token connects your local Storybook builds to Chromatic’s cloud infrastructure. Every snapshot Chromatic takes is stored in the cloud and associated with your Git commit history. This means you can trace any visual change back to the exact commit that caused it.
Step 2: Run Your First Build to Establish Baselines
Your first Chromatic build captures the current state of every Storybook story. These screenshots become the baselines that future builds are compared against.
npx chromatic --project-token=YOUR_PROJECT_TOKENChromatic will:
- Build your Storybook
- Upload it to Chromatic’s cloud
- Take a snapshot of every story in a cloud browser
- Store all snapshots as your initial baselines
You will see output like:
Build 1 published.
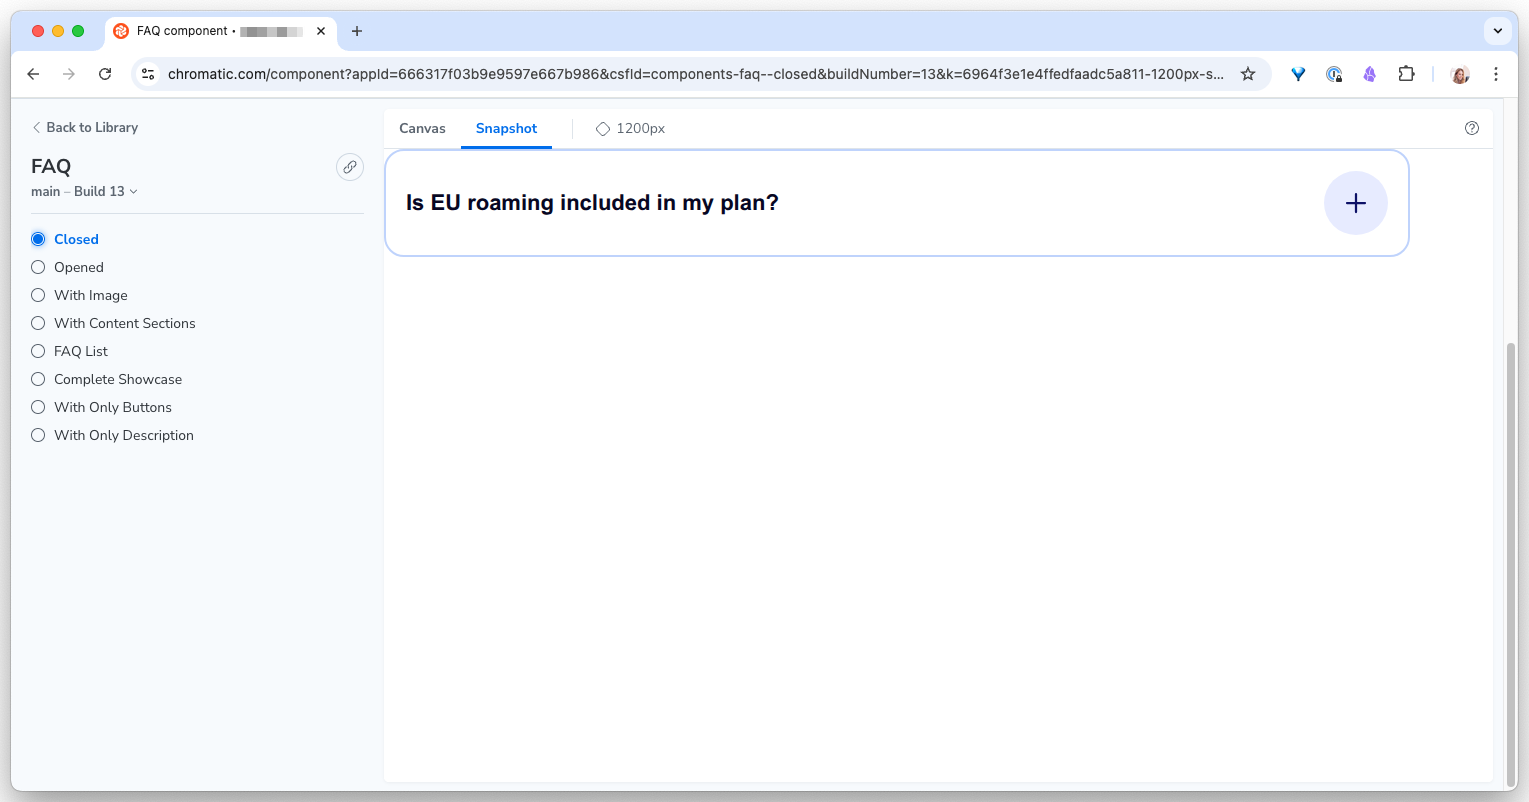
View it online at https://www.chromatic.com/build?appId=...&number=1Click the link to see all your component snapshots in the Chromatic dashboard. Browse through them to verify everything looks correct.
Click into any component to inspect its variants side by side. Every state becomes its own snapshot, so a regression in one variant cannot hide behind a clean run on another.
Why this step matters: The first build is pure setup. Nothing gets flagged because there is nothing to compare against yet. But from this point forward, every subsequent build compares against these baselines. This is your visual ground truth.
Step 3: Make a Change and Review the Diff
Now comes the part that makes Chromatic valuable. Make a small visual change to one of your components (update a color, change a border-radius, adjust padding) and run Chromatic again:
npx chromatic --project-token=YOUR_PROJECT_TOKENThis time, Chromatic compares the new snapshots against your baselines. If anything changed visually, the build is marked as “unreviewed” and you get a link to the review interface.
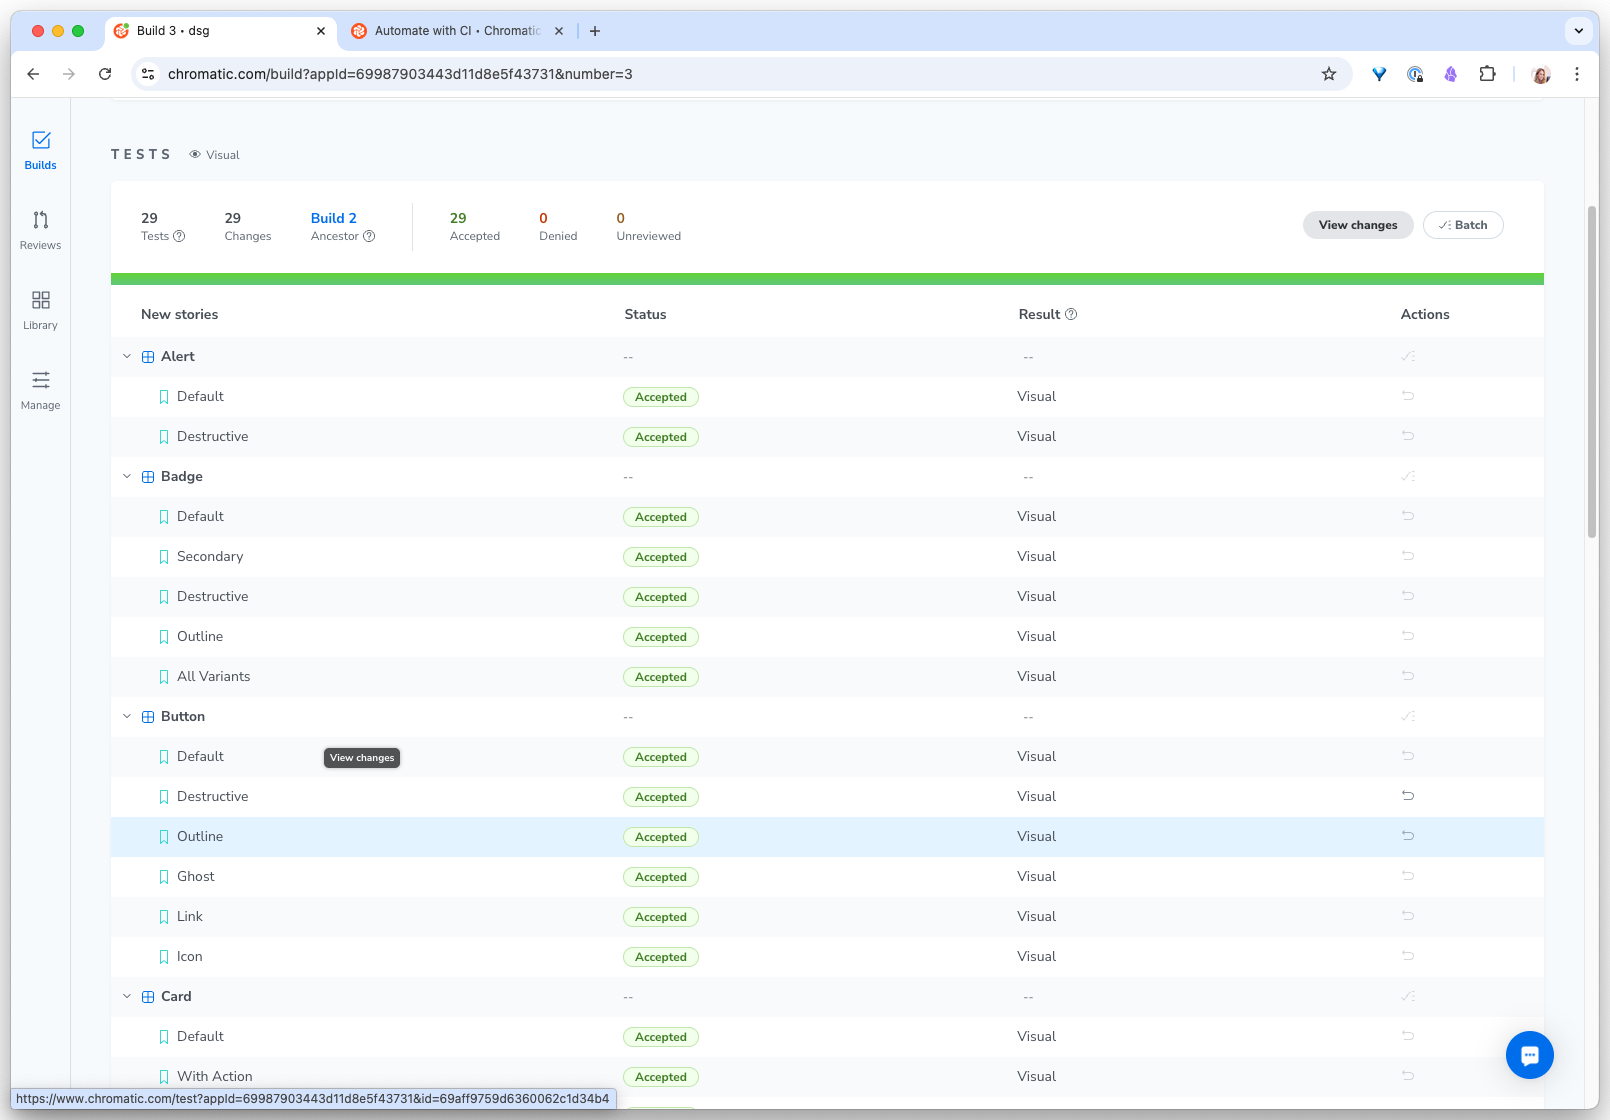
In the Chromatic dashboard, you will see:
- A list of changed stories showing which components have visual differences
- Side-by-side comparison with the baseline on the left and the new version on the right
- A pixel diff overlay highlighting exactly which areas changed
For each change, you have two options:
- Accept: This is an intentional change. Update the baseline to the new version.
- Deny: This is a regression. The change should not have happened. The build fails, blocking the merge.
Build 2 published.
  2 stories changed
  48 stories unchanged

Review: https://www.chromatic.com/build?appId=...&number=2
Why this step matters: This is the design review workflow that most teams are missing. Without Chromatic, visual changes slip through code review because engineers are reviewing code, not pixels. With Chromatic, every visual change requires explicit acknowledgment. Accidental regressions get caught. Intentional changes get documented.
Step 4: Connect to Your CI Pipeline
Running Chromatic manually works for initial setup, but the real value comes from running it automatically on every pull request.
Add your project token as a secret in your CI environment (never commit tokens to your repository). Then add Chromatic to your CI workflow.
For GitHub Actions, create .github/workflows/chromatic.yml:
name: Chromatic

on:
  push:
    branches:
      - main
  pull_request:
    branches:
      - main

jobs:
  chromatic:
    runs-on: ubuntu-latest
    steps:
      - name: Checkout
        uses: actions/checkout@v5
        with:
          fetch-depth: 0

      - name: Install dependencies
        run: npm ci

      - name: Run Chromatic
        uses: chromaui/action@latest
        with:
          projectToken: ${{ secrets.CHROMATIC_PROJECT_TOKEN }}
Once this is in place, every pull request will automatically:
- Build your Storybook
- Take snapshots of every story
- Compare against the baselines from the target branch
- Add a “UI Tests” status check to the PR
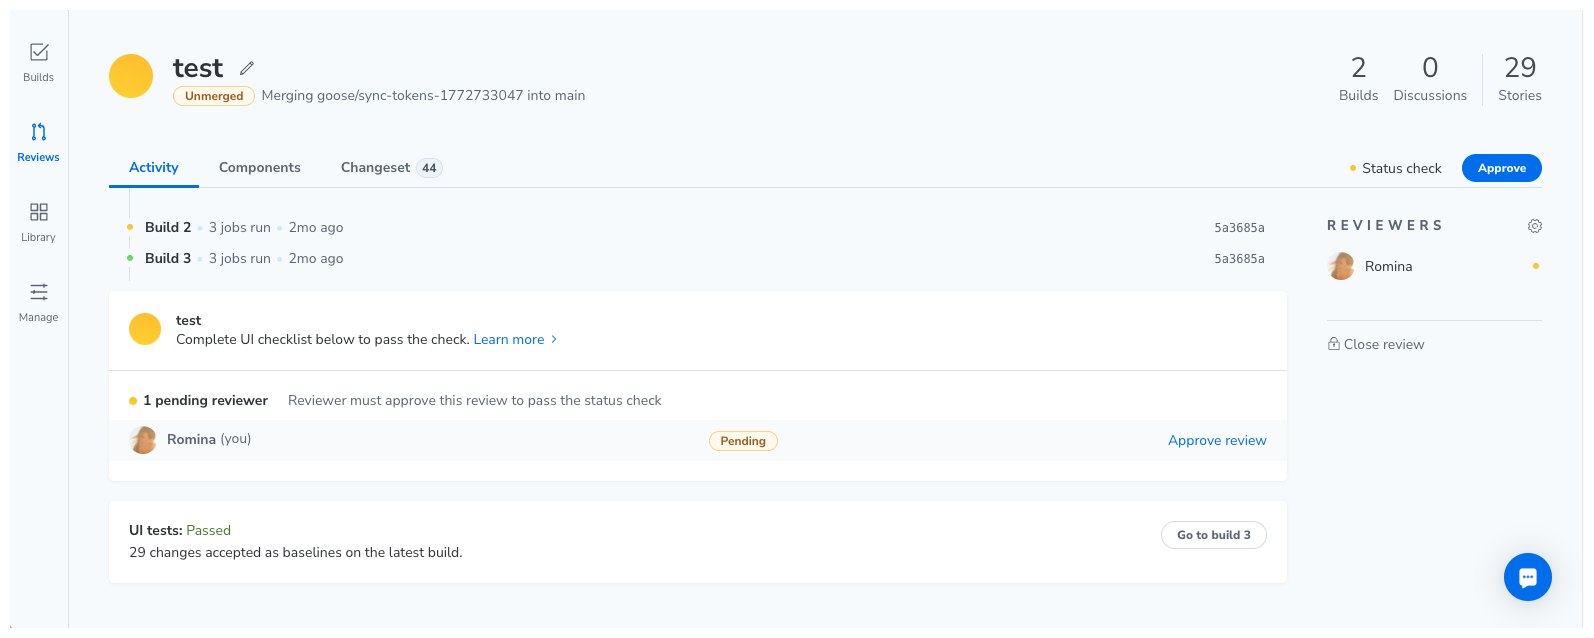
If there are visual changes, the PR cannot merge until someone reviews and accepts them in Chromatic. If everything matches, the check passes automatically.
Why this step matters: Automation is what turns visual testing from a nice idea into an actual safety net. When Chromatic runs on every PR, visual regressions cannot reach production unless someone explicitly approves them. This is the same level of rigor that engineering teams apply to code, now applied to your UI.
What You Get
- Automatic visual snapshots of every Storybook story on every commit.
- Pixel-level change detection that flags differences between builds.
- A review interface where designers and engineers can approve or reject visual changes.
- PR status checks that block merges until visual changes are reviewed.
- Branch-level baselines. Each branch maintains its own baselines, so parallel feature work does not conflict.
- Discussion threads pinned to specific visual changes, keeping feedback precise and contextual.
Common Pitfalls
- Missing
fetch-depth: 0. Chromatic needs your full Git history to determine baselines. Withoutfetch-depth: 0in your checkout step, it cannot find the right baseline to compare against. - Flaky snapshots from animations. Components with CSS animations or transitions can produce inconsistent snapshots. Disable animations in your Storybook configuration for testing, or use Chromatic’s built-in animation pause feature.
- Snapshot overuse. The free tier includes 5,000 snapshots per month. Each story, on each browser, on each viewport counts as one snapshot. If you have 200 stories and test on 2 browsers, that is 400 snapshots per build. Plan accordingly, or use Chromatic’s TurboSnap feature to only snapshot stories affected by code changes.
- Storybook build failures. If your Storybook does not build cleanly, Chromatic cannot take snapshots. Always verify
npm run build-storybookworks locally before your first Chromatic run.
Run one Chromatic build on a real Storybook and review a diff
-
Publish the first build as your baseline
In a project that already has Storybook, install the Chromatic CLI and run your first build:
npx chromatic --project-token=YOUR_PROJECT_TOKEN. Open the dashboard link from the output. Scroll through every snapshot and confirm nothing looks broken.- The run printed a “Build 1 published” line with a Chromatic URL
- Every story in your Storybook has a snapshot (no missing renders)
- You can name at least one component whose baseline you would want reviewed before it counts as ground truth
-
Trigger a real diff and decide accept or deny
Make one small intentional visual change to a component (a border-radius, a padding, a color). Run
npx chromaticagain. Open the review interface. Accept the change if it was intended, deny it if it would be a regression. Then connect the workflow to GitHub Actions using the YAML from Step 4 so this happens on every PR.- The second build shows “N stories changed” and routes you to a side-by-side diff
- The PR gets a “UI Tests” status check from Chromatic
- The check blocks merge until you or a teammate reviews the change
Finished this lesson?
Mark it complete to track your progress through "Automation for DS Teams".
The guides alone saved me a full day of work every sprint.
- All guides, prompts, and templates
- Starter kits and templates
- New content every week
- Priority support